Mrs M's Rover 216 cabrio
- richard moss
- Posts: 233
- Joined: Wed Sep 24, 2008 5:23 pm
- Location: Wolverhampton
Re: Mrs M's Rover 216 cabrio
If I tried to sell it I would end up dead. However, you are number one in my will!
1990 827 Sterling manual
1990 Jaguar Sovereign 4 Litre on LPG
1969 MGC GT (currently hibernating)
1990 Jaguar Sovereign 4 Litre on LPG
1969 MGC GT (currently hibernating)
- richard moss
- Posts: 233
- Joined: Wed Sep 24, 2008 5:23 pm
- Location: Wolverhampton
Re: Mrs M's Rover 216 cabrio
I've been fitting a new (well, good second hand) hood to this today. It's a good quality fabric one, in blue, and would have been VERY expensive when new - with inner liner, rear window and the rear retaining rail it would have been £600+ when new (even more with the frame). I paid a lot less than the price of a cheap and nasty aftermarket vinyl one (they come in at £200 or so) so I'm rather pleased with the purchase.
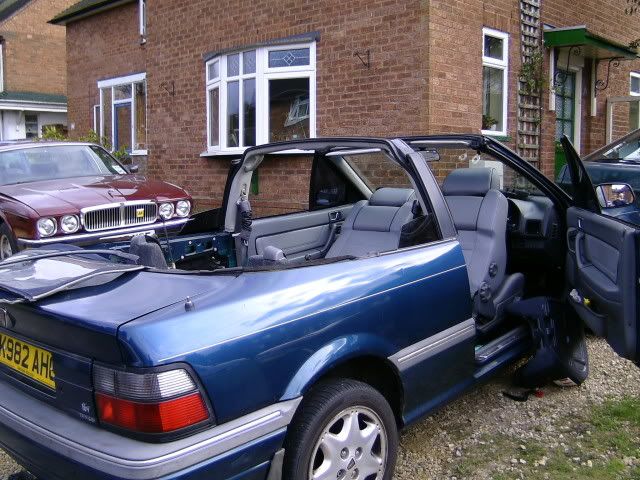
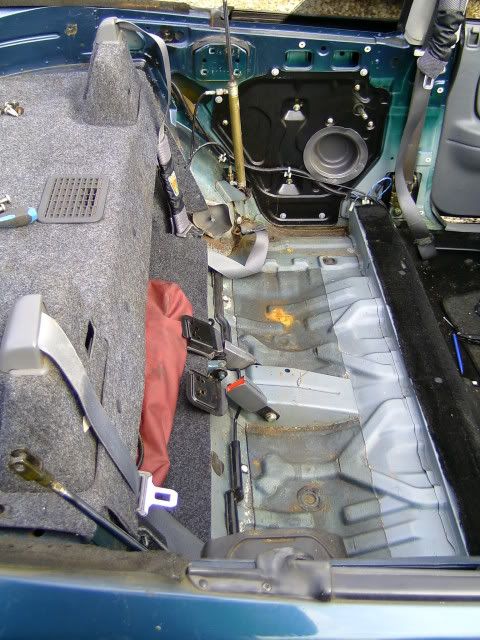
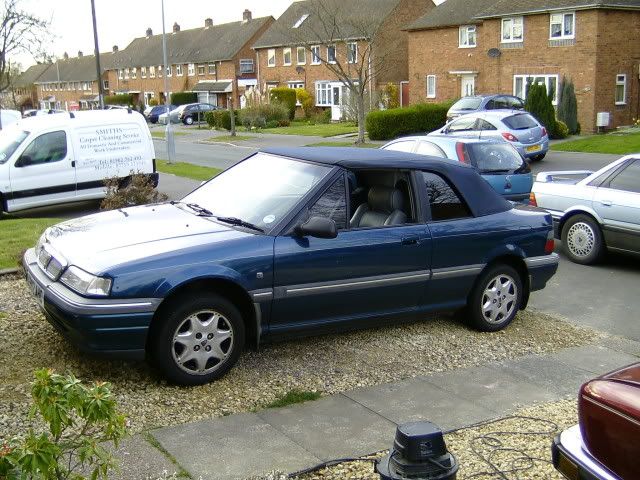
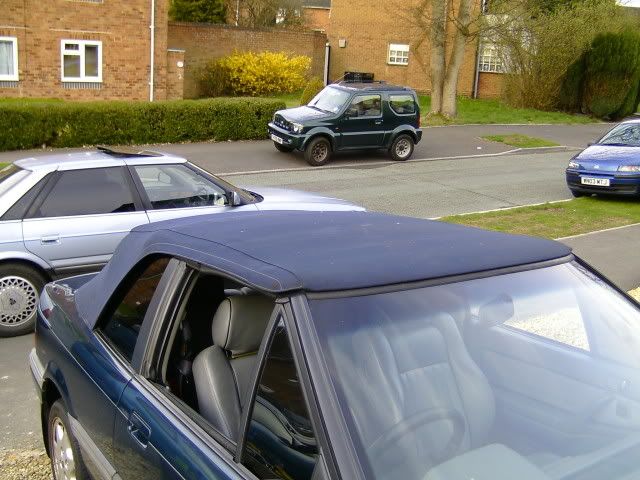
It's been given a good wash tonight and will be reproofing it tomorrow once dry. The original hood was falling apart, badly fitting and getting a bit draughty - not to mention the rusty frame.. The new one is a nice snug fit and looks great.


It's been given a good wash tonight and will be reproofing it tomorrow once dry. The original hood was falling apart, badly fitting and getting a bit draughty - not to mention the rusty frame.. The new one is a nice snug fit and looks great.
1990 827 Sterling manual
1990 Jaguar Sovereign 4 Litre on LPG
1969 MGC GT (currently hibernating)
1990 Jaguar Sovereign 4 Litre on LPG
1969 MGC GT (currently hibernating)
- Phil - Nottingham
- Posts: 357
- Joined: Thu Oct 09, 2008 10:45 am
- Location: Nottingham
Re: Mrs M's Rover 216 cabrio
Looks good - signs of leaks on the rear seat pan as well
P2/P4/P5/P5B/LR's - EXJ 8**/2**8MY & others
- richard moss
- Posts: 233
- Joined: Wed Sep 24, 2008 5:23 pm
- Location: Wolverhampton
Re: Mrs M's Rover 216 cabrio
No leaks on the seat pan - there's a fair bit of dirt and a rusty mark where a couple of pennies were sitting. Believe it or not, the pennies went rusty (have you noticed that "copper" coins are magnetic now?).
1990 827 Sterling manual
1990 Jaguar Sovereign 4 Litre on LPG
1969 MGC GT (currently hibernating)
1990 Jaguar Sovereign 4 Litre on LPG
1969 MGC GT (currently hibernating)
- richard moss
- Posts: 233
- Joined: Wed Sep 24, 2008 5:23 pm
- Location: Wolverhampton
Re: Mrs M's Rover 216 cabrio
19th April:
I had to replace the back box on this yesterday - as you can see, the old one was a bit tired! The new one cost just £36 inc VAT from my local car parts shop - compared to £35 + VAT + postage (£47) from buypartsby.co.uk
The old one had given good service, though - I thought it was past it when we bought the car 18 months back and had to patch it up to pass the MOT 10 months ago. Can't be bad.
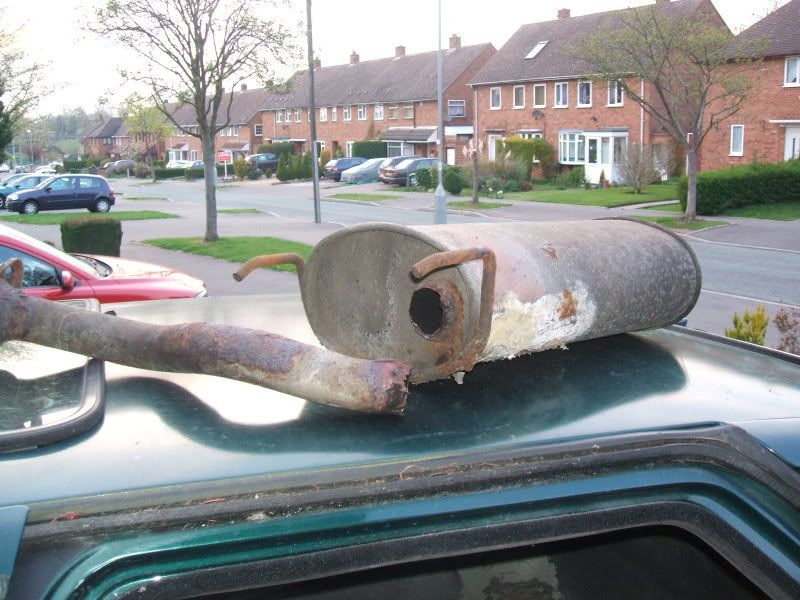
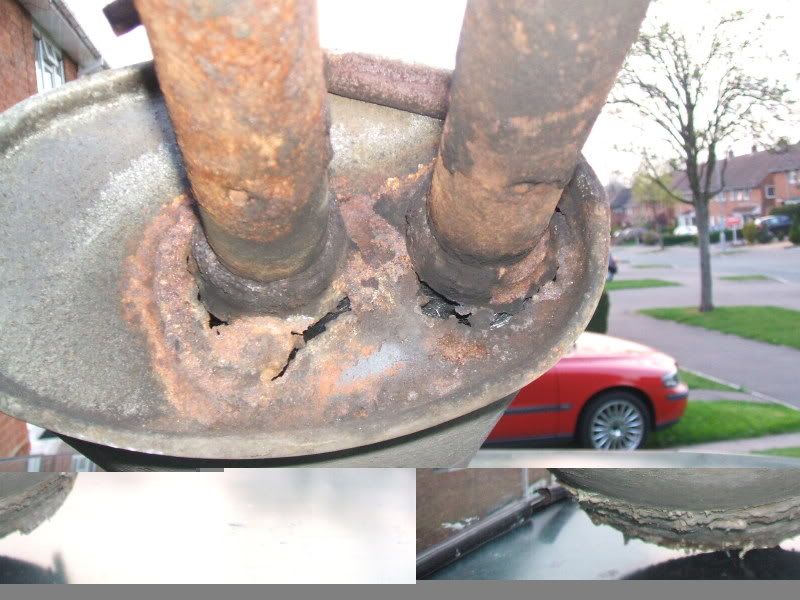
Of course, whilst fitting it I found that the centre box was holed so I've got one on order for monday. That should be slightly cheaper.
On the plus side, I sold the old hood frame from the cabrio for £72 on ebay - I was expecting a tenner or so!
26th April:
The replacement pipe was a good fit but the bolts connecting it to the catalytic convertor were well and truly rusted on. In the end I dropped the cat and centre pipe together and attacked it with my 12v electric impact wrench - and even then I had to take the angle grinder to one of the nuts.
Still, it's all back together and that's the centre and rear pipes replaced (along with all the required gaskets) for £74 and a couple of hours of my time.
I had to replace the back box on this yesterday - as you can see, the old one was a bit tired! The new one cost just £36 inc VAT from my local car parts shop - compared to £35 + VAT + postage (£47) from buypartsby.co.uk
The old one had given good service, though - I thought it was past it when we bought the car 18 months back and had to patch it up to pass the MOT 10 months ago. Can't be bad.


Of course, whilst fitting it I found that the centre box was holed so I've got one on order for monday. That should be slightly cheaper.
On the plus side, I sold the old hood frame from the cabrio for £72 on ebay - I was expecting a tenner or so!
26th April:
The replacement pipe was a good fit but the bolts connecting it to the catalytic convertor were well and truly rusted on. In the end I dropped the cat and centre pipe together and attacked it with my 12v electric impact wrench - and even then I had to take the angle grinder to one of the nuts.
Still, it's all back together and that's the centre and rear pipes replaced (along with all the required gaskets) for £74 and a couple of hours of my time.
1990 827 Sterling manual
1990 Jaguar Sovereign 4 Litre on LPG
1969 MGC GT (currently hibernating)
1990 Jaguar Sovereign 4 Litre on LPG
1969 MGC GT (currently hibernating)
- richard moss
- Posts: 233
- Joined: Wed Sep 24, 2008 5:23 pm
- Location: Wolverhampton
Re: Mrs M's Rover 216 cabrio
23rd May:
Anyone who has ever done any work on a 200 or 400 will recognise these: knackered trailing arm bushes.
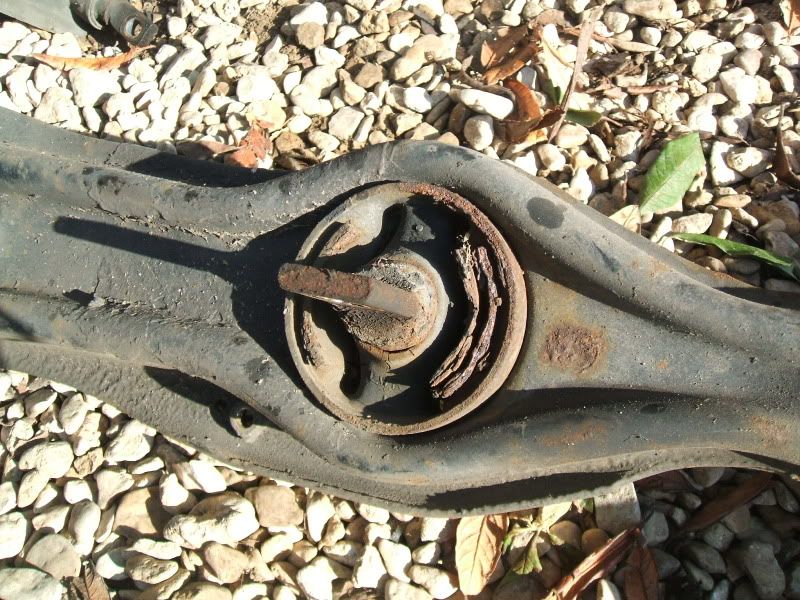
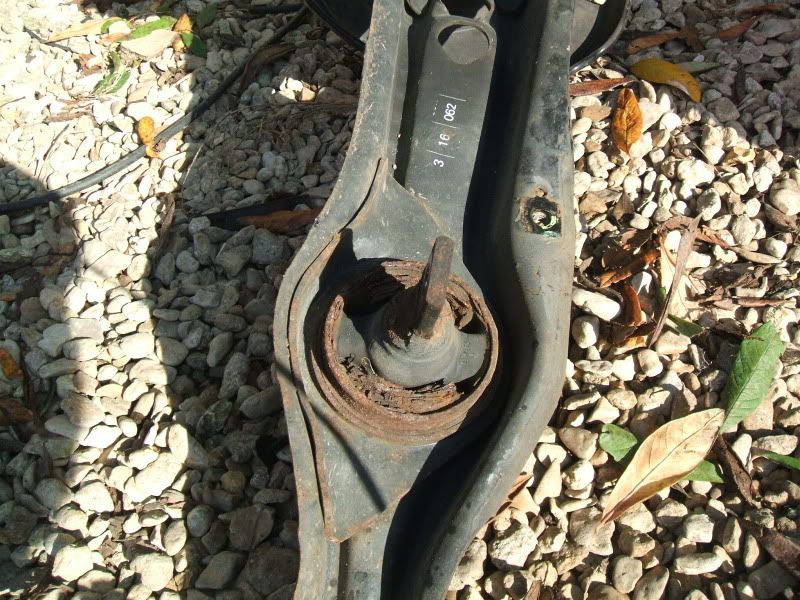
All you have to do is pull off the arm, bash the old bush out and tap the new one in. I was (almost) a little disappointed as the bush came out quite easily when I expected it to put up a bit of a fight!
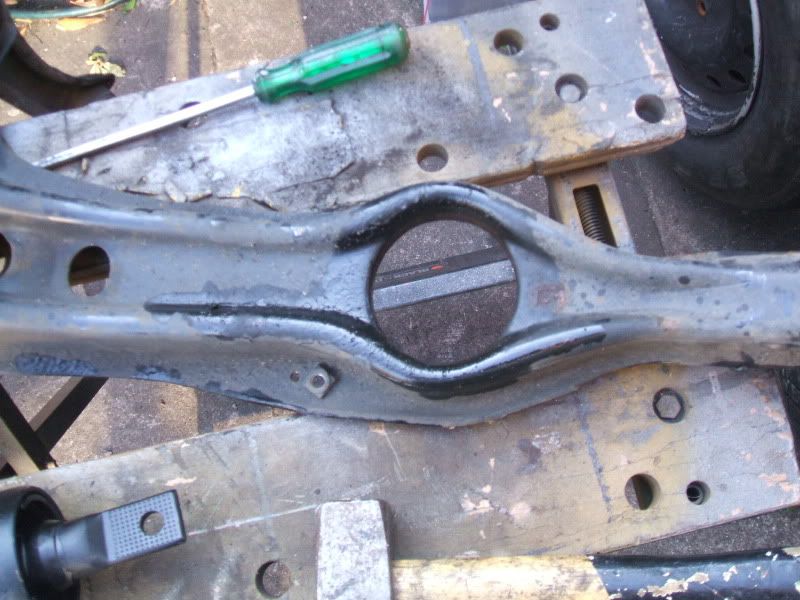
I forgot to take the "after" photos as I was trying to make up time after doing battle with loads of rusty nuts and bolts - because "just removing the arm" is never as easy as it sounds. At least the new bushes are only £10 each.
1st June:
First time MOT pass - another good day!
Anyone who has ever done any work on a 200 or 400 will recognise these: knackered trailing arm bushes.


All you have to do is pull off the arm, bash the old bush out and tap the new one in. I was (almost) a little disappointed as the bush came out quite easily when I expected it to put up a bit of a fight!

I forgot to take the "after" photos as I was trying to make up time after doing battle with loads of rusty nuts and bolts - because "just removing the arm" is never as easy as it sounds. At least the new bushes are only £10 each.
1st June:
First time MOT pass - another good day!
1990 827 Sterling manual
1990 Jaguar Sovereign 4 Litre on LPG
1969 MGC GT (currently hibernating)
1990 Jaguar Sovereign 4 Litre on LPG
1969 MGC GT (currently hibernating)
- richard moss
- Posts: 233
- Joined: Wed Sep 24, 2008 5:23 pm
- Location: Wolverhampton
Re: Mrs M's Rover 216 cabrio
I finally got round to doing the timing belt on the cabrio on sunday. I won't go through a full "How To", just a few tips and pointers.
To improve access I removed the PAS pump and its bracket, but left the hoses attached and just pulled the pump out of the way. The expansion tank was removed and the bottom radiator hose removed to drain the coolant - I was replacing the water pump so needed the coolant draining out, anyway.
First, the crank pulley bolt. I ended up (after trying several methods) rounding off the end of a long Allen key and jamming it into one of the holes in the crank pulley. Once that was in, I was able to wedge it against the chassis rail and attack the 17mm crank bolt with my breaker bar. In the end I had to hold onto the bumper and push with my foot - but it got there. The same technique was used for tightening. I tried a bolt first time but that just bent but the Allen key is more rigid.
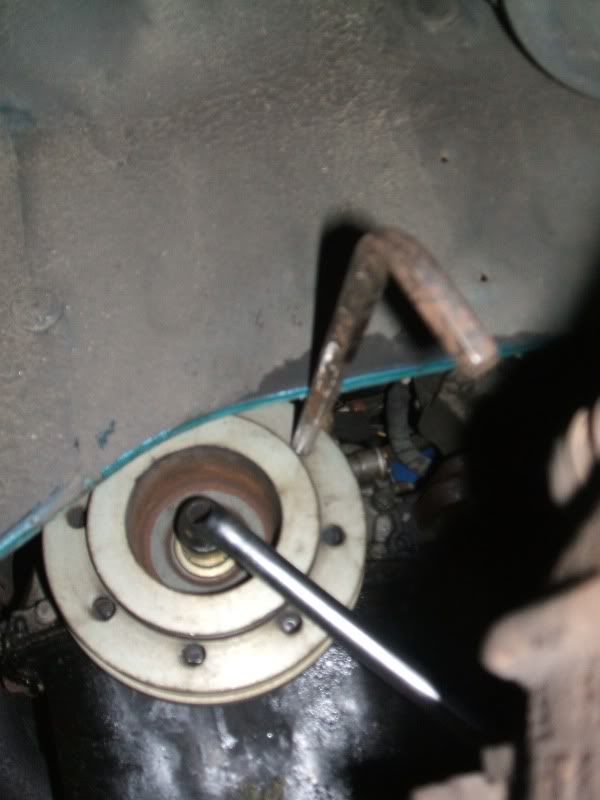
Take care when pulling off the pulley - I found that the "woodruff" key on the crankshaft came out easily and could have dropped out. I removed it from the crankshaft and taped it to the pulley for safe keeping. Sorry about the lousy photo (autofocus camera looking at the wrong thing). :
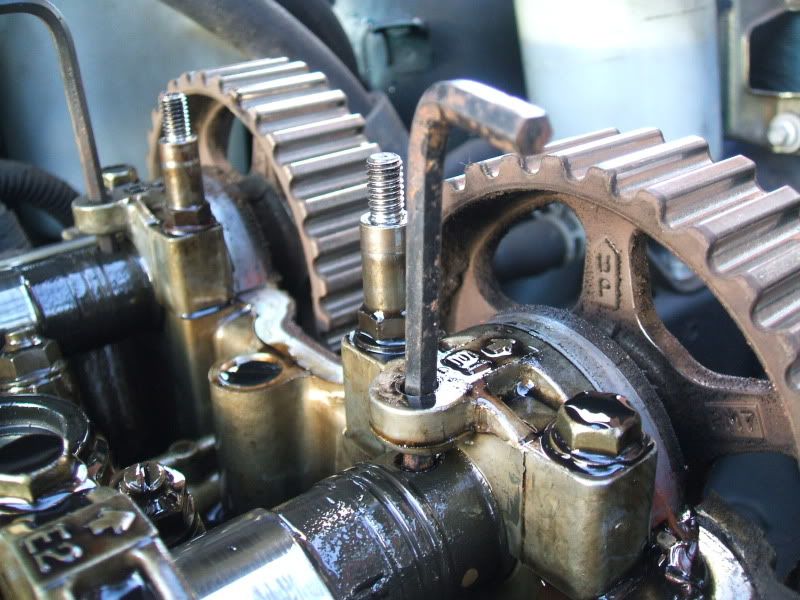
Before removing the belt I removed the cam cover and locked the camshafts with another couple of Allen keys. To be honest, the cams didn't feel as if they were going to move anyway:
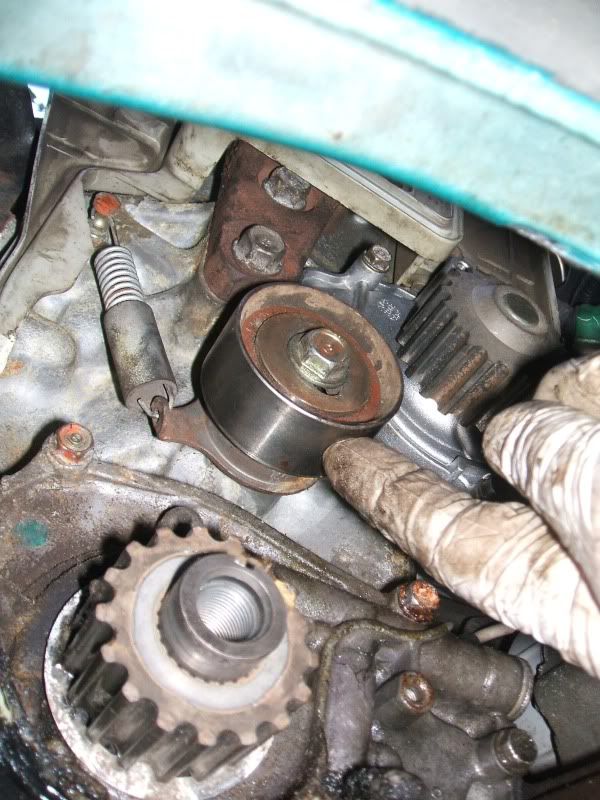
Then I removed the lower timing cover and took off the lower cambelt guide washer behind the pulley - it's dished so you need to note which way round it goes for re-fitting (it curves outwards, for reference). I then released the tensioner bolt (14mm), drew the tensioner down and re-tightened the bolt. After removing the belt I removed the tensioner completely in order to get better access to the water pump. The tensioner felt very smooth so I took a chance and re-used it (the car doesn't do much mileage, just 5,000 per year on average):
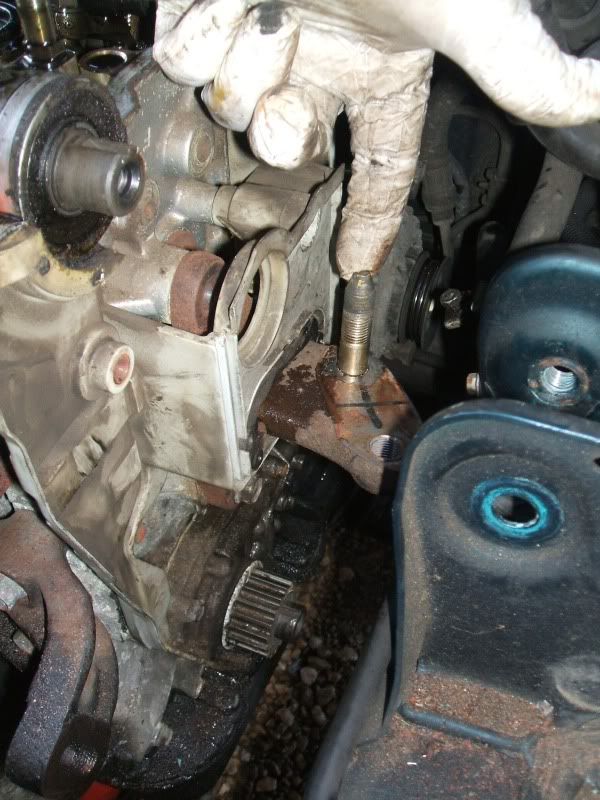
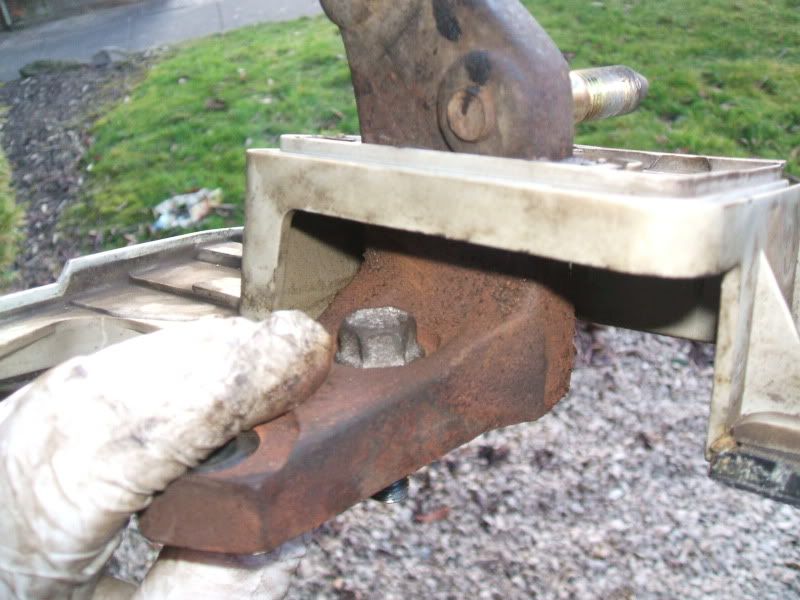
To get better access to the water pump (which I was changing on a "just in case basis") I removed the upper engine mount (2 x 14mm bolt, the upper one of which is partially hidden) - but the cam pulleys have to come off first (12mm bolts I think) and each of those has a small, easy to lose woodruff key. The engine was supported under the sump with a trolley jack and block of wood:
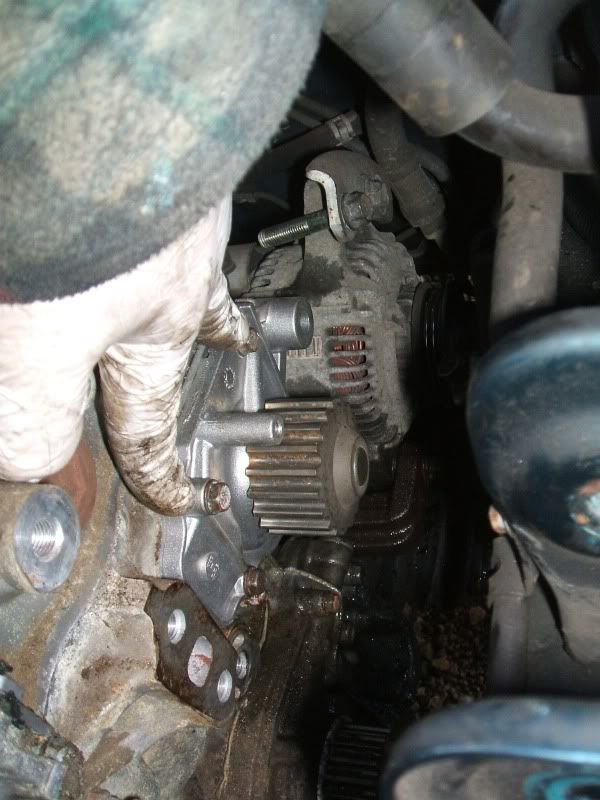
After the mount has been removed, disconnect the alternator bracket from the water pump (14mm bolt) and then the pump can come off (4 x 10mm bolt) - 2 at the top and another 2 at the bottom. The water pump bearing felt really "gritty" so I'm glad I decided to change it:
Putting it back together was just, as the Haynes manual says, the reverse of removal. The new cam belt was noticeably more tight than the old one. I took the chance to fit new PAS and alternator belts and also do an oil change. As always, I turned the engine over by hand a few times to make sure that it felt OK before attempting to start it. I reckon that I took about 5 hours all told but that would be a lot quicker next time (if there was a next time!).
To improve access I removed the PAS pump and its bracket, but left the hoses attached and just pulled the pump out of the way. The expansion tank was removed and the bottom radiator hose removed to drain the coolant - I was replacing the water pump so needed the coolant draining out, anyway.
First, the crank pulley bolt. I ended up (after trying several methods) rounding off the end of a long Allen key and jamming it into one of the holes in the crank pulley. Once that was in, I was able to wedge it against the chassis rail and attack the 17mm crank bolt with my breaker bar. In the end I had to hold onto the bumper and push with my foot - but it got there. The same technique was used for tightening. I tried a bolt first time but that just bent but the Allen key is more rigid.

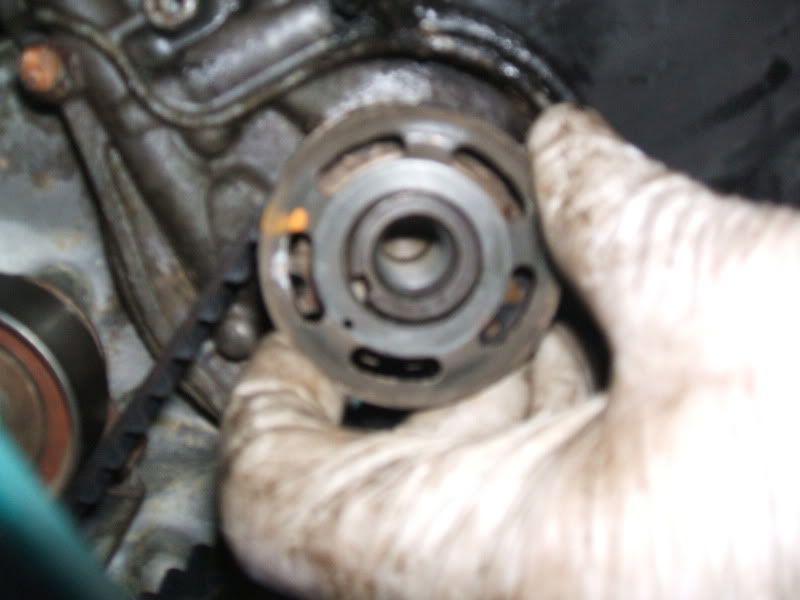
Take care when pulling off the pulley - I found that the "woodruff" key on the crankshaft came out easily and could have dropped out. I removed it from the crankshaft and taped it to the pulley for safe keeping. Sorry about the lousy photo (autofocus camera looking at the wrong thing). :

Before removing the belt I removed the cam cover and locked the camshafts with another couple of Allen keys. To be honest, the cams didn't feel as if they were going to move anyway:

Then I removed the lower timing cover and took off the lower cambelt guide washer behind the pulley - it's dished so you need to note which way round it goes for re-fitting (it curves outwards, for reference). I then released the tensioner bolt (14mm), drew the tensioner down and re-tightened the bolt. After removing the belt I removed the tensioner completely in order to get better access to the water pump. The tensioner felt very smooth so I took a chance and re-used it (the car doesn't do much mileage, just 5,000 per year on average):


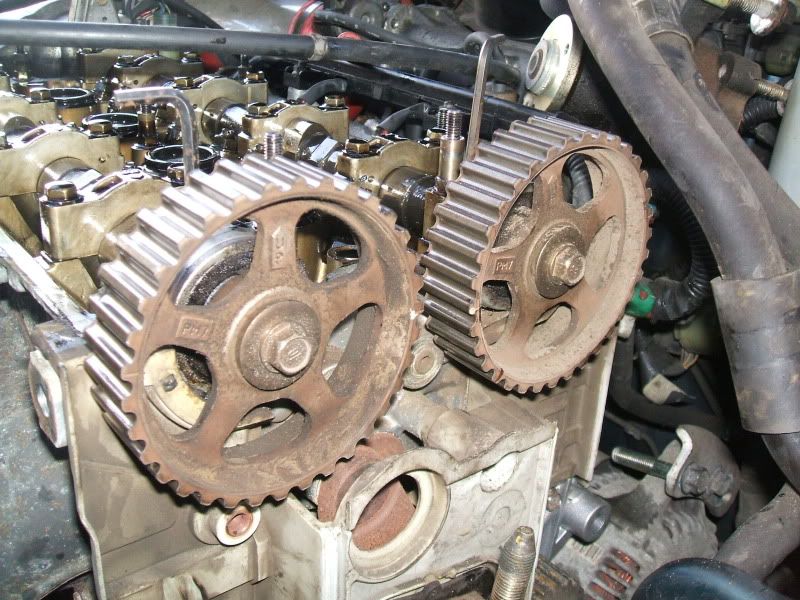
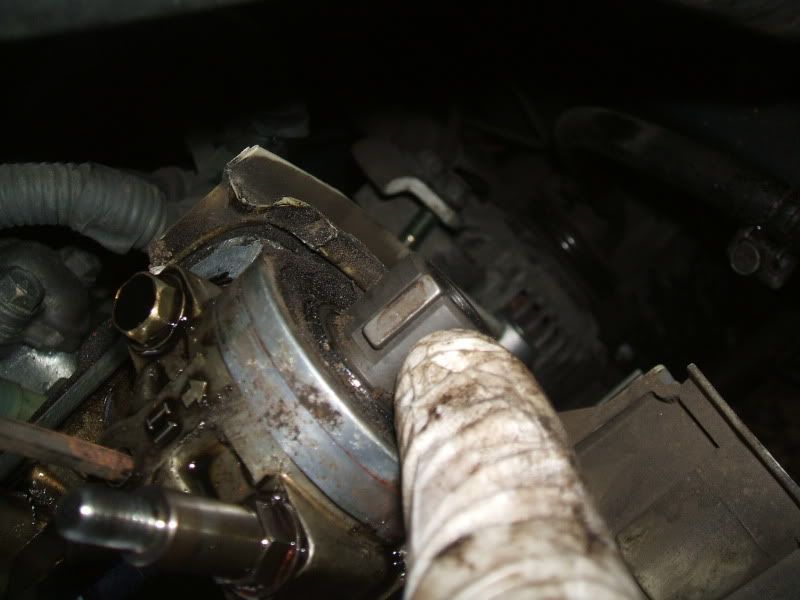
To get better access to the water pump (which I was changing on a "just in case basis") I removed the upper engine mount (2 x 14mm bolt, the upper one of which is partially hidden) - but the cam pulleys have to come off first (12mm bolts I think) and each of those has a small, easy to lose woodruff key. The engine was supported under the sump with a trolley jack and block of wood:


After the mount has been removed, disconnect the alternator bracket from the water pump (14mm bolt) and then the pump can come off (4 x 10mm bolt) - 2 at the top and another 2 at the bottom. The water pump bearing felt really "gritty" so I'm glad I decided to change it:

Putting it back together was just, as the Haynes manual says, the reverse of removal. The new cam belt was noticeably more tight than the old one. I took the chance to fit new PAS and alternator belts and also do an oil change. As always, I turned the engine over by hand a few times to make sure that it felt OK before attempting to start it. I reckon that I took about 5 hours all told but that would be a lot quicker next time (if there was a next time!).
1990 827 Sterling manual
1990 Jaguar Sovereign 4 Litre on LPG
1969 MGC GT (currently hibernating)
1990 Jaguar Sovereign 4 Litre on LPG
1969 MGC GT (currently hibernating)
- richard moss
- Posts: 233
- Joined: Wed Sep 24, 2008 5:23 pm
- Location: Wolverhampton
Re: Mrs M's Rover 216 cabrio
I've made a start on replacing the rear screen on this. The old plastic window had gone brittle and recently cracked whilst the hood was being lowered.
The rear panel is removable and whilst replacements are readily available they are all PVC (if cheap) or flipping expensive (if blue canvas, like our hood). So I decided to get some of the clear material from a trim materials supplier (http://www.segalmotortrimmings.net/) which cost about £40 including VAT and postage for a piece big enough for the screen. That was the cheapest price I found on the web for the correct 0.75mm thickness "Vybak" material.
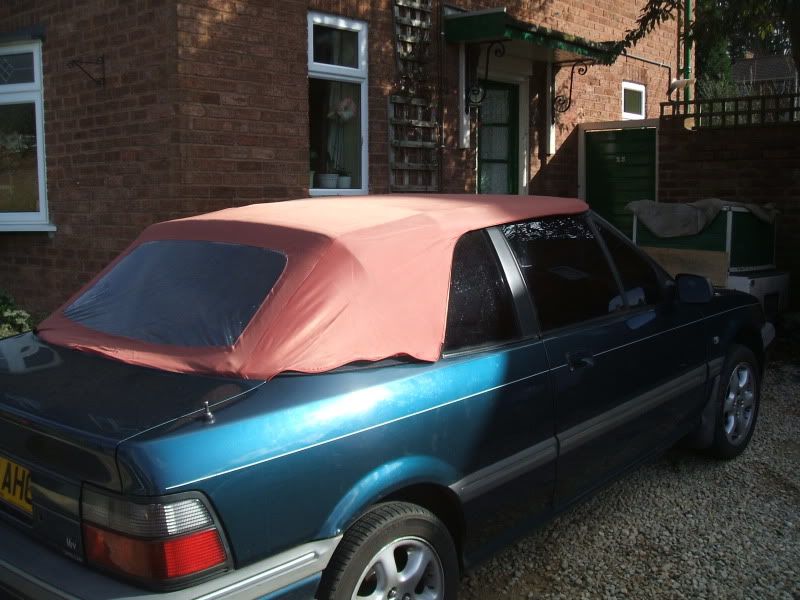
First job was to remove the window and fit the emergency hood cover that Rover supplied with the car (I'll take a picture of that tomorrow). This is a lightweight get you home cover that just slips over the hood frame and is clamped by the windows and front rail.
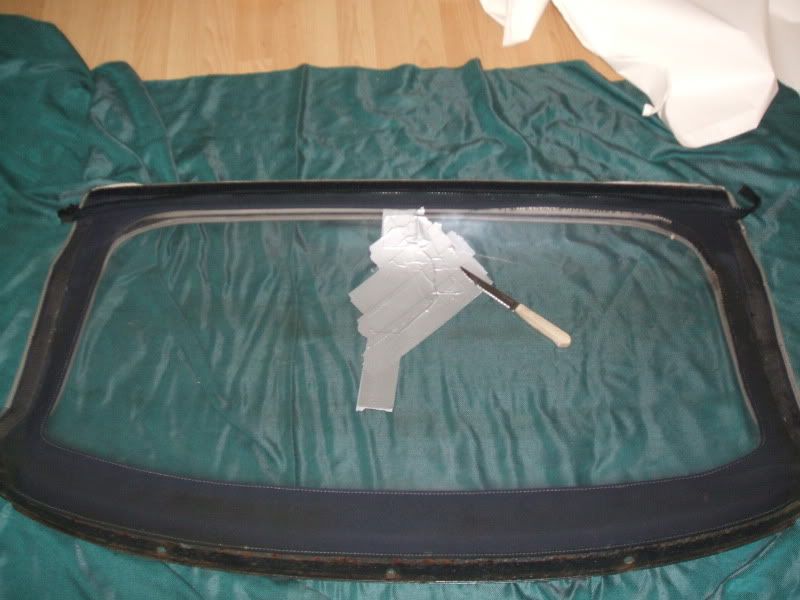
This is the damaged window with the crack patched up with duct tape.
I cut the stitching with a sharp knife (no going back now) and removed the window.
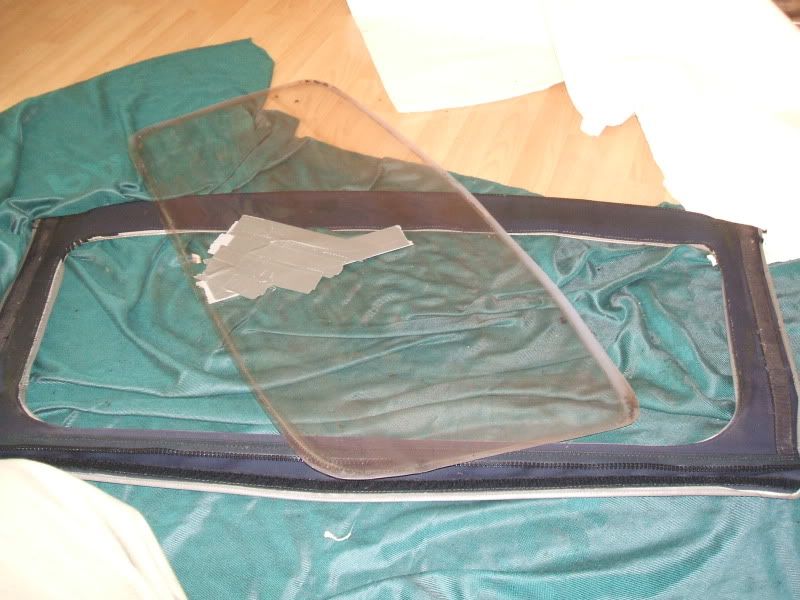
I traced around the old window onto the new Vybak, cut it out and fixed it in place with duct tape whilst I started to sew it in. I used navy blue "button thread" because it's more robust than normal thread. I sewed a few patches to hold the screen in place and filled in the gap (tack weld then seam weld!). At least, that's the plan - I've done 80% of the sewing and given up for the night because it's damned hard work pushing a needle through a double layer of canvas and the screen material, too.
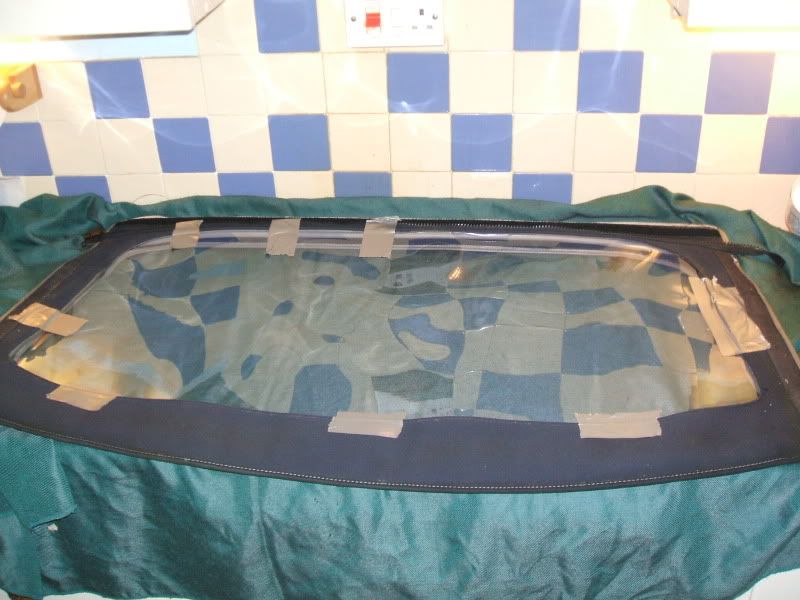
Pictures of the finished article tomorrow.
The rear panel is removable and whilst replacements are readily available they are all PVC (if cheap) or flipping expensive (if blue canvas, like our hood). So I decided to get some of the clear material from a trim materials supplier (http://www.segalmotortrimmings.net/) which cost about £40 including VAT and postage for a piece big enough for the screen. That was the cheapest price I found on the web for the correct 0.75mm thickness "Vybak" material.
First job was to remove the window and fit the emergency hood cover that Rover supplied with the car (I'll take a picture of that tomorrow). This is a lightweight get you home cover that just slips over the hood frame and is clamped by the windows and front rail.
This is the damaged window with the crack patched up with duct tape.

I cut the stitching with a sharp knife (no going back now) and removed the window.

I traced around the old window onto the new Vybak, cut it out and fixed it in place with duct tape whilst I started to sew it in. I used navy blue "button thread" because it's more robust than normal thread. I sewed a few patches to hold the screen in place and filled in the gap (tack weld then seam weld!). At least, that's the plan - I've done 80% of the sewing and given up for the night because it's damned hard work pushing a needle through a double layer of canvas and the screen material, too.

Pictures of the finished article tomorrow.
1990 827 Sterling manual
1990 Jaguar Sovereign 4 Litre on LPG
1969 MGC GT (currently hibernating)
1990 Jaguar Sovereign 4 Litre on LPG
1969 MGC GT (currently hibernating)
- richard moss
- Posts: 233
- Joined: Wed Sep 24, 2008 5:23 pm
- Location: Wolverhampton
Re: Mrs M's Rover 216 cabrio
Here's the completed window panel:
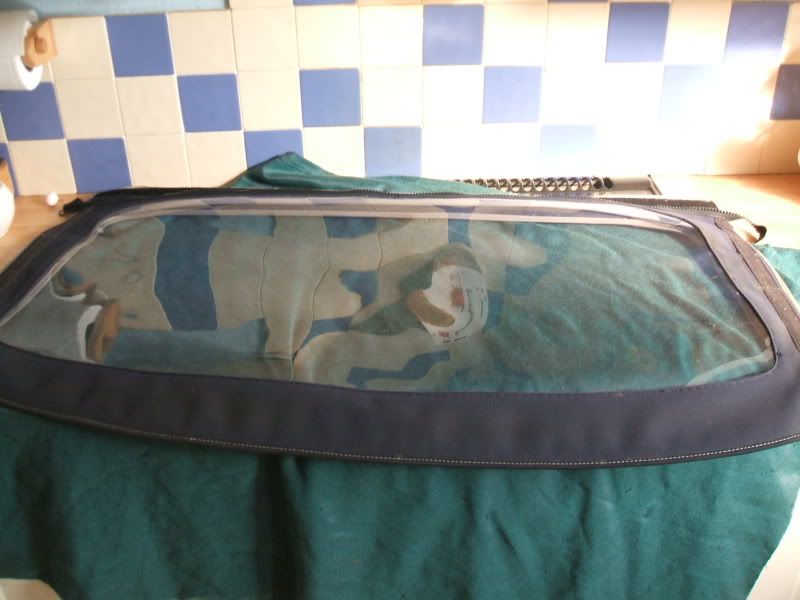
Installed:
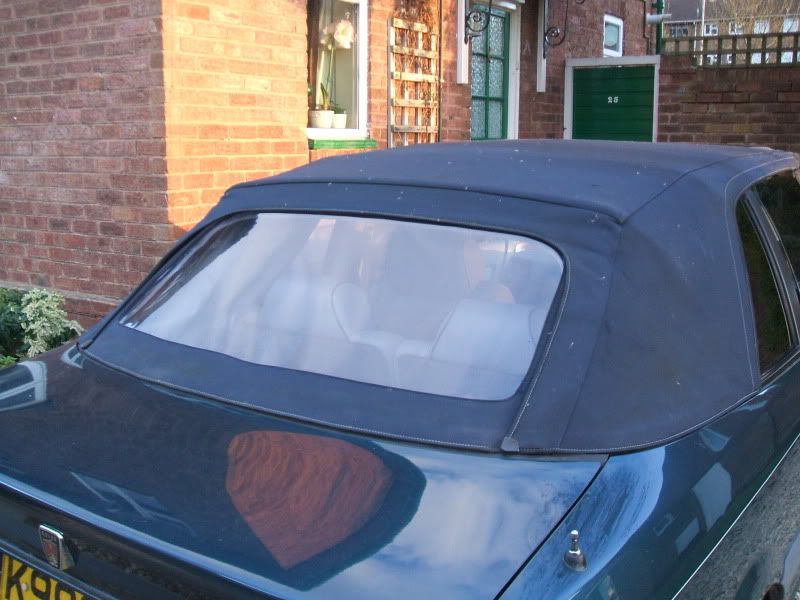
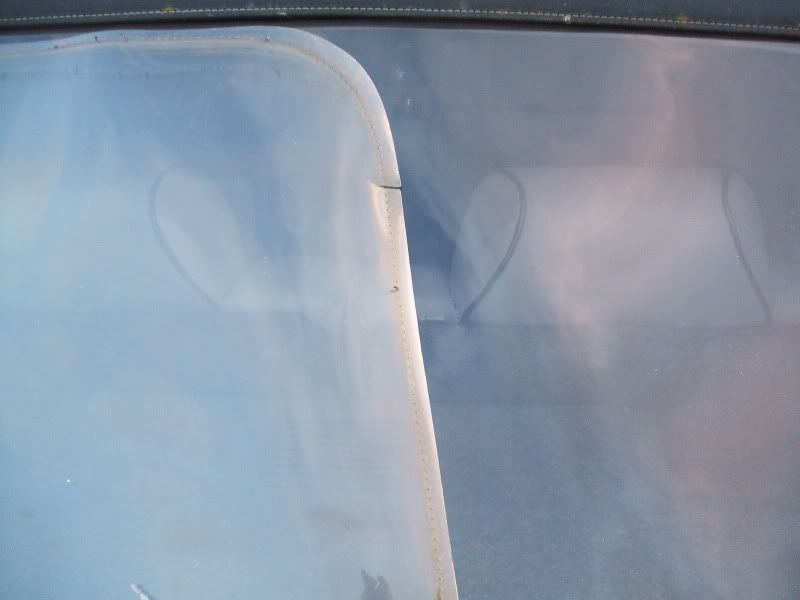
Compare the new panel with the old - you can see how milky it had gone and no amount of polishing with the special polish would clear it:
Out of interest, this is the emergency hood. It's not a perfect fit but would keep the rain out:
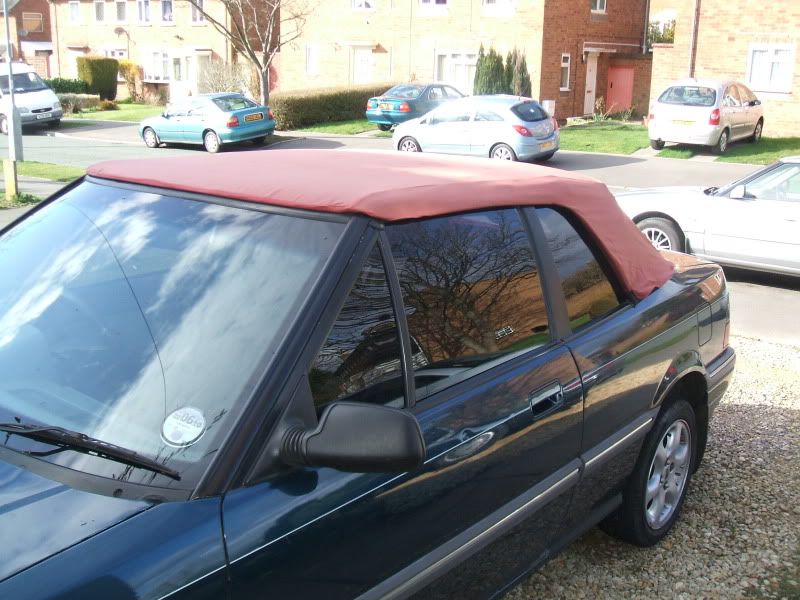
Overall I'm quite pleased with the result.

Installed:

Compare the new panel with the old - you can see how milky it had gone and no amount of polishing with the special polish would clear it:

Out of interest, this is the emergency hood. It's not a perfect fit but would keep the rain out:


Overall I'm quite pleased with the result.
1990 827 Sterling manual
1990 Jaguar Sovereign 4 Litre on LPG
1969 MGC GT (currently hibernating)
1990 Jaguar Sovereign 4 Litre on LPG
1969 MGC GT (currently hibernating)