Dash lettering

P3Steve
Posts: 123
Joined: Sun Sep 28, 2008 7:05 am

Re: Dash lettering

Post by P3Steve » Thu Apr 07, 2011 12:12 pm

Here are two photo's of the dash lettering as described in the last post. isnt always the case that when you take a photo close up you see how the letters are out just a bit but believe me it looks better in the flesh

Image

Image

User avatar
47p2
Posts: 767
Joined: Wed Sep 24, 2008 7:51 pm
Location: Scotland
Contact:

Re: Dash lettering

Post by 47p2 » Thu Apr 07, 2011 3:54 pm

Great effort Steve, did you lacquer them?

User avatar
Phil - Nottingham
Posts: 357
Joined: Thu Oct 09, 2008 10:45 am
Location: Nottingham

Re: Dash lettering

Post by Phil - Nottingham » Thu Apr 07, 2011 10:24 pm

Really useful tip and they look good
P2/P4/P5/P5B/LR's - EXJ 8**/2**8MY & others

P3Steve
Posts: 123
Joined: Sun Sep 28, 2008 7:05 am

Re: Dash lettering

Post by P3Steve » Thu Apr 07, 2011 10:57 pm

I have now, I used a touch up lacquer and brushed over the letters. I did a test bit first and it came out ok but when I did the dash the letters turned opaque and I feared the worst and thought I would have to strip them off and start again but when the lacquer dried it cleared and there ok now. If they do ever get damaged or scratched there are enough letters on the sheet to do them again if needs be.

neil.henderson
Posts: 72
Joined: Sat Feb 19, 2011 2:15 am
Location: Murrumbateman, NSW, Australia

Re: Dash lettering

Post by neil.henderson » Sun Apr 10, 2011 9:42 am

The lettering solution looks really good & in keeping with the P3. But I notice that your dash is black with a wood background - mine is a scratched silvery/chrome colour with wood background. Is the P3 dash supposed to be black or silvery?
I am starting a complete renovation so a change is quite simple -rather like the black, but is it original?

Cheers Neil

User avatar
47p2
Posts: 767
Joined: Wed Sep 24, 2008 7:51 pm
Location: Scotland
Contact:

Re: Dash lettering

Post by 47p2 » Sun Apr 10, 2011 9:59 am

Black would be original Neil

P3Steve
Posts: 123
Joined: Sun Sep 28, 2008 7:05 am

Re: Dash lettering

Post by P3Steve » Sun Apr 10, 2011 1:27 pm

some one in the past had painted it completly black but am I right in thinking that the edge should be left chrome? starting to doubt my self here.

User avatar
47p2
Posts: 767
Joined: Wed Sep 24, 2008 7:51 pm
Location: Scotland
Contact:

Re: Dash lettering

Post by 47p2 » Sun Apr 10, 2011 2:23 pm

Yes the outer edge should be left chrome as seen on my P2 picture
Image

User avatar
36t46s
Posts: 32
Joined: Mon May 04, 2009 4:28 pm

Re: Dash lettering

Post by 36t46s » Mon Mar 04, 2013 11:54 pm

P3Steve wrote:Just repainted the dash centre section on the P3. Someone had done it long ago so the lettering has long been lost (so had the chrome edge) I was going to make up some water slide transfers on the pc for the lettering for the switches but was wondering has any one done this before if so what is the type face and font size for the lettering?
As I could not find the original P2 font anywhere on the web, I decided to digitally reconstruct the upper case letters as a custom font (using Fontstruct). The letters with distinctive and attractive period features are: A E F G K N P R S and V. The original font was used by Rover in labelling diagrams, as well as by Lucas in their parts catalogues.

For the STARTER, ON OFF lettering I have prepared a page in MS Word for printing out circular self-adhesive stickers, white (no ink) on black. The material I use is designed for inkjet printing and is made of polypropylene, 60µ thick. It is intended for outdoor use and should prove extremely durable, especially if coated with a protective lacquer. As the material is slightly flexible it accommodates to the slightly convex shape of the circular switch panel.

The sticker is stuck onto the switch panel, after carefully cutting two holes (shown with finely-dotted circles) for the starter button and the key barrel. This can be done before the sticker backing is removed with a fine blade such as a scalpel. Provided that the surface is chemically clean, the sticker will adhere well when pressure is applied.

[img][img]http://www.freeimagehosting.net/t/3k4px.jpg[/img][/img]

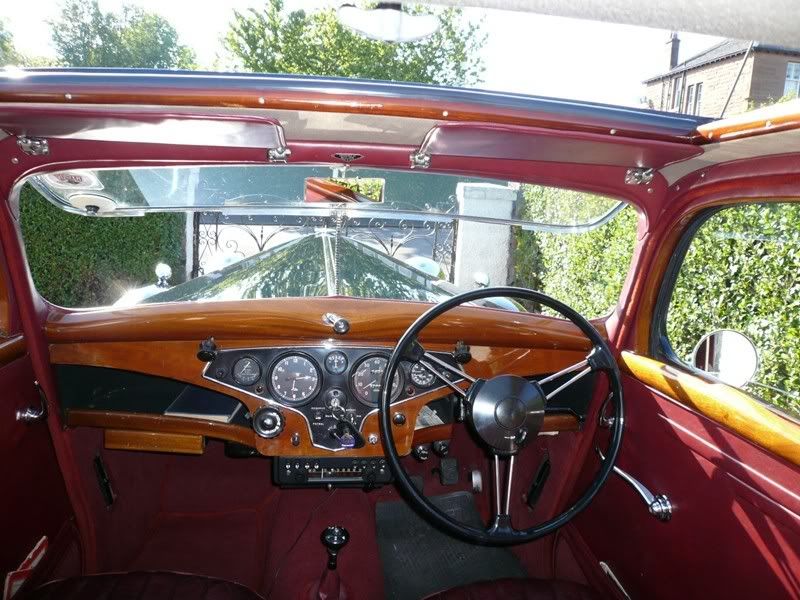
For the lettering on the instrument panel itself, the options are to use stickers for each word, for each switch, or for the entire panel. I have decided on the whole- panel approach for my 1946 10.

[img][img]http://www.freeimagehosting.net/t/cin52.jpg[/img][/img]

[img][img]http://www.freeimagehosting.net/t/pwfnm.jpg[/img][/img]

User avatar
47p2
Posts: 767
Joined: Wed Sep 24, 2008 7:51 pm
Location: Scotland
Contact:

Re: Dash lettering

Post by 47p2 » Tue Mar 05, 2013 9:10 am

Looks great, well done

Post Reply